- Home
- Wedding Cakes
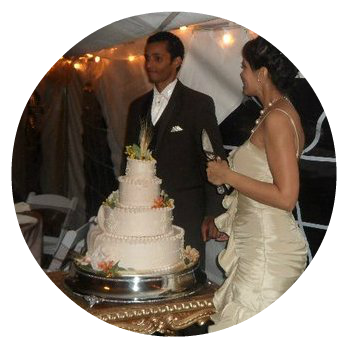
Wedding Cake Gallery
Indulging brides with
beautiful and delicious custom wedding cakes for a truly unforgettable grand finale.
We Have Moved and Retired from Making Wedding Cakes. PLEASE use this page as inspiration for a wedding cake design.
I still run a YouTube Channel called Cakes with Lorelie where I share recipes and techniques for baking and decorating cakes. Also take a look at my guides and books if you're interested in learning how to make your own cakes.
Thank you to all of my beutiful bride and groom customers. I am honoered to have been a special part of your wedding day.
Lorelie

"Our cake was in a word "AMAZING!!!" I cried the first time I tasted it at our tasting with the beautiful and talented baker/artist Lorelie. You were a huge part of our magical day. We love you Lorelie"
~Corina and Maceo~*New York
Live in Connecticut or nearby? Why not work with me? Together, you and I will create the cake of your dreams.
Let's share in the design process so that your cake fits exclusively with your theme and colors. Together we will find the exact balance of texture and taste so that you and your guests will experience the most incredible finale to your magical day.
Wedding Cake Flavors
A Little About Wedding Cake Prices
The Wedding Cake Gallery
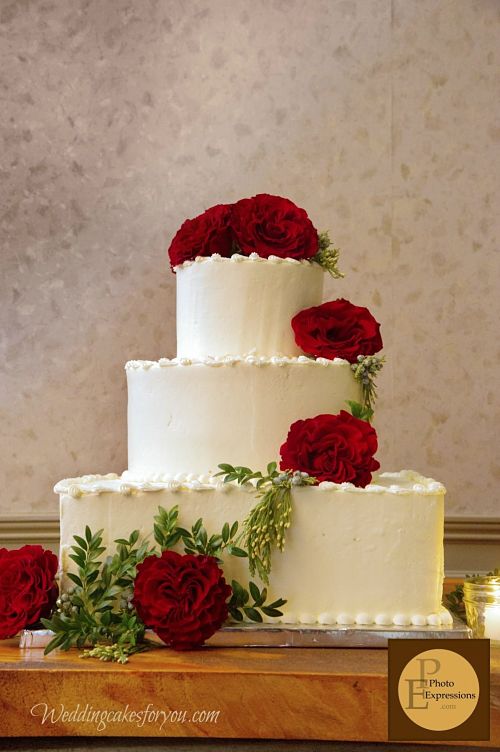
 Brian and Jeniffer's Luscious Ruffled Wedding Cake with Fresh Flowers October 27 2018
Nature Inspired Lightly Frosted Cakes

"We trusted Lorelie to create a beautiful and delicious wedding cake via phone and email with no previous tasting. It turned out wonderful! The wedding cake was beautiful and VERY good! "~Kelly Doolittle~

"Lorelie!! You have amazed us once again, and this time amazed our guests. The orange white cake with white chocolate raspberry filling and caramel drips you created for our June 23 wedding at Keeler Tavern looked beautiful! And of course was to die for "! ~Kerry Karner~

"Our cake tasting was beyond phenomenal, we even got plenty to take home! We kind of gave Lorelie a base of what we wanted and would like to see and she went above and beyond to exceed our expectations! I could not have asked for a more beautifully delicious cake for our wonderful day. Trust Lorelie and be sure you will get exactly what you wanted and then some"!~Stephanie Sheerin~
"Thank you SO much for the beautiful cake!! Everyone raved about how beautiful the cake was and then everyone raved about how amazing it tasted! There are still people talking and asking about the awesome orange cake! ~Karel Dlugonkowski~
Rustic Buttercream Cakes
 A Luscious White Chocolate Raspberry Cake Adorned with Textured Buttercream and Buttercream Flowers for Lori and Steve. Beautiful photo by Dan Kane Photos June 2017
Buttercream Texture
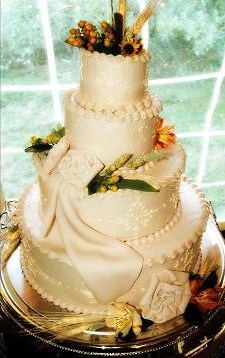
 A Dreamy Lavender and Rosemary Wedding Cake for Hathaway Young at Lion Rock Farm. Fresh Roses and Olive Branches by Felicity Bontecou
Traditional Wedding Cakes

"We still have people raving about the basket weave cake and how delicious it was! My sister was at a cocktail party in the city the other night and someone accosted her about it! "~Pete Hathaway~ Hathaway Young Catering
Unique Custom Cakes

 Adrienne and Sean's Fondant Cake With Sugarpaste Flowers and Monogram - Thank You Jag Studios For The Photo
 A New version of the Dogwood Cake for a Quinceneara or Wedding Celebration
Words From Wedding Cakes For You Brides at The Wedding Cake Gallery
Our cakes were not only gorgeous but they were also delish! The cake was a perfect light orange butter flavor, not too sweet. It had a wonderful homemade flavor.
I gave Lorelie no instructions as to cake decoration and let her use her own creative energy. Our cakes were amazing and represented our tropical wedding perfectly! I highly recommend Wedding Cakes For You. Lorelie can be trusted with your cake vision!"~Rebecca Main~
Sheer Elegance
"Lorelie is simply the CAKE FAIRY!!!!! and her heart is as big as her cakes are delicious and gorgeous. People are still talking about my wedding cake almost three years later."
Your beautiful spirit adds that extra special something to the taste of the ones you make! People are still talking about it!!! THANK YOU AGAIN for being a part of our MAGICAL DAY! OCTOBER 9, 2010"
~Corina & Maceo~
A Bridal Shower Cake

It was a pleasure working with Lorelie for my bridal shower cake! She worked with me and my mom every step of the way and took the vision I had and just ran with it! Not only are her cakes absolutely beautiful and creative, they ARE the BEST tasting cakes I've ever had!
Lorelie’s cakes truly are amazing! The cherry blossom cake Lorelie made for my shower became the center of attention as it was that perfect! Thanks again Lorelie for making my special day even better
~J Holly ~
Winter Wedding Cake
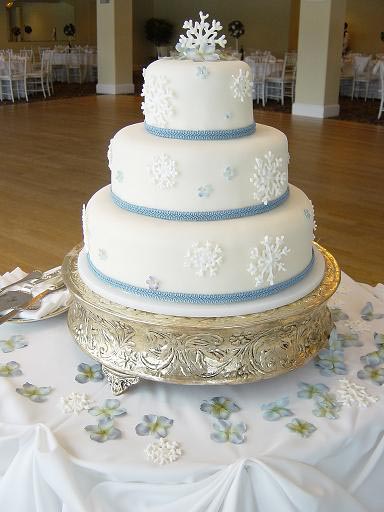
Our snowflake wedding cake was absolutely magnificent!
Lorelie did an amazing job . I was in shock when I saw it, it looked just like the picture I sent her, only better. It was incredibly gorgeous and totally scrumptious! Lorelie is a true artist and I am so appreciative of her creative ingenuity and natural talent! Thank you from the bottom of my heart for making the perfect wedding cake of my dreams!"
~Warmly Mellisa~
This article was printed from Wedding-Cakes-For-You.com
You might like these
DIY Bride Make Your Own Wedding Cake
DIY Bride are you making your own wedding cake ?
Winter Wedding Cakes Fantasy in the Forrest
A Winter Wedding Cakes Fantasy set in a Forrest of Christmas Trees
Valentine Cakes
Valentine Cakes Photo Shoot for Wedding Chicks Blog Feature
Fairytale Wedding Cake Designs For Ever After Bridal Photo Shoot
Ever After Bridal wedding cake designs for a photo shoot featuring Veluz Reyes gowns and Real Housewives on new York Kristen Taekman


Step-by-Step Book

Video Guides

Order a Cake
"Lorelie is simply the CAKE FAIRY!!!!! and her heart is as big as her cakes are delicious and gorgeous. People are still talking about our cake almost three years later".
~Maceo & Corina~ New York City
Free Ebook

When you sign up for Cakes with Lorelie Newsletter


