- Home
- All Occasion
- Mickey Mouse Birthday Cake
Mickey Mouse Birthday Cake
by Michele Owen
(Beachwood Ohio)
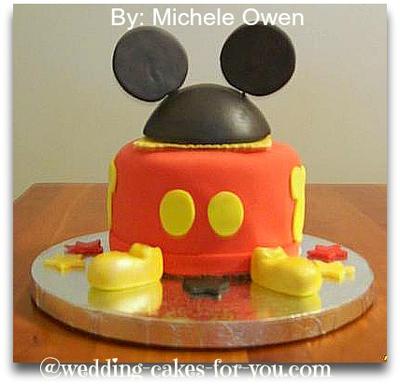
Mickey Mouse Birthday Cake
This Mickey Mouse birthday cake was for a one year old girl's birthday.
Here is how I made this fun Mickey Mouse Cake
The hat was constructed by cutting out a circle and forming it on a Styrofoam ball that had been cut in half. Toothpicks were used to mark holes where the ears were to be placed and then left to dry.
Next came the mouse ears which were formed with fondant and tooth picks inserted into each one. The shoes were molded by hand and then the rest of the decorations were made with cutters.
The flavor was a yummy vanilla with fresh strawberries and vanilla buttercream.
The only hitch came with the fondant. Leary to color a large amount of fondant, I opted to use a manufacturer's red pre-made fondant. It was too heavy for the cake and had to be pulled off, so I ended up coloring the fondant that I normally use and it worked great.
The Styrofoam was cut to fit under the hat, applied with piping gel and placed onto a yellow square for the cake topper. The ears were attached next and then it was time to decorate the cake.
It was a lot of work but when my client saw her Mickey Mouse birthday cake it, it was all worth while!
Comments for Mickey Mouse Birthday Cake
|
||
|
||
|
||
|
||
This article was printed from Wedding-Cakes-For-You.com


